Friday 30 January 2015

The best brush to de-tangle your hair!

EasyTease de-tangling brush

To all the girls with thick, knotty hair, I feel you! I hate brushing my hair with the passion and try to avoid it as much as possible. I've used every de-tangling spray going and I've used every de-tangling brush there is but nothing compares to this brush. First of all its way cheaper than the tangle teezer. Second, it actually works and its not painful. I had this as a gift but you can buy it from websites such as Amazon or eBay. It usually ranges from £5 - £8, basically the budget version of the tangle teezer. EasyTease comes in many different colours to. So what I love about this is it has a handle. When ever I have use a de-tangling brush, its usually dome shaped and has no handle so when you have a big knot in your hair, it can get stuck and be really painful. This on the other hand makes that so much easier because if I do have a big knot, I can pull it very gently and the firm bristles somehow gets through the knot without pain which brings me onto my next point. The bristles are firm and not as sharp as knives. They glide through knots with such ease and it usually takes one brush through a knot for it to disappear. I cant recommend this brush enough if you really hate the chore of brushing your hair.

Let me know if you have the brush, what are your opinions on it?

Thanks for reading, zoeelizabethdowden x  

Thursday 29 January 2015

The eyelash curling trick everyone needs to know!

The Essentials.
So I always find better ways to apply my makeup to get the best out of products but what I'm most proud of to date is a eyelash curling trick that I'm pretty sure I'm the only person who does it. I'm so excited to share this and I hope it works on you as good as it works on me. I first put MACs carbon eyeshadow really close to my eyelash (any black eyeshadow will do) with a MAC 212 brush. Try not to create an actual line as you want to give the effect that your lashes are a lot thicker than they appear. After that, curl your lashes as you normally would before applying your mascara. I then put my first layer of mascara on with Revlon's Grow Luscious in blackest black. This gives my lashes volume. Next I put my second layer of mascara on with Seventeen's Falsifeye HD in black. This gives my lashes separation and length. I then repeat putting both mascaras on again. So normally your eyelashes would be done at this point but this is where my trick comes in. What I do is get my eyelash curlers and without opening them, I press the metal curve (the part which usually opens) against my eyelashes for 30 seconds and repeat on my second eye. This not only takes off any clumpy excess, it also dries the eyelashes into the position i'm holding them in. My eyelashes never go back to their normal form and they stayed curled all day. I swear by this trick and I'm so proud of it. 

I would love anyone to comment to let me know if my trick works for you to.

Thanks for reading, zoeelizabethdowden x

Monday 26 January 2015

Top 5 Face Makeup Disasters

So this is part 2 of more makeup disasters that really irritate me but hey, what ever tickles your fancy. Here are my top 5 face makeup disasters which make me want to apply for snog, marry, avoid on behalf of these people.

1. 'Foundation lines'
I've had actual conversations with friends where they have admitted to walking into drugstores and picking up a random bottle of foundation. Doesn't anyone wonder why there are so many different shades? What tickles me is when my friends go home and put the foundation on, they accept the fact that it may be 3 shades to dark BUT ITS FINNNEEE. Not many people know the ins and outs of makeup brushes when they first discover makeup so its just as easy as squirting one to many pumps of foundation on your hand and rubbing it all over your face. This is when the dreaded foundation line begin. I have learnt when choosing the right foundation colour, DO NOT SWATCH ON THE BACK OF YOUR HAND! Your hand is a complete different colour to your face so please take my advice and swatch foundation on your neck, that way when you apply your foundation and blend it down your kneck, it will look more natural and if applied correctly, it will be all one colour.

2. 'OTT contouring'
Contouring can look amazing if done correctly. It can make your cheekbones look defined and make your face look slimmer It can also look like orange sideburns and a 5 o clock shadow. A lighter touch is much more effective.

3.'Overdrawn lips'
No-one likes thin lips. FACT! There are lip plumpers, botox (in some extreme cases) but what seems to be the easier option is lip liner. Lip liner is an absolute must to ensure longer wear of a lip product and to stop any feathering. Its also a fantastic illusion to make your lips appear fuller. However, coordinating the right colour lip liner to a product actually helps. If you draw a dark line over your cupids bow, we can see it, if you use a dark liner with a light lip product, its obvious and making your top lip bigger than your bottom lip instantly gives your fish lips. Not good.

4.'Too much highlight'
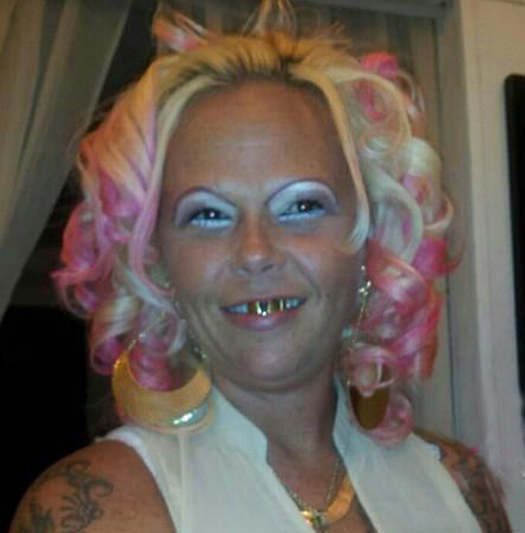
I love having a dewy finish to my skin but to much highlighter can make you look oil slick. I have also found when makeup is done immaculate but the highlight is on the heavy side, it almost gives the impression of looking plastic, almost like a barbie doll.

5.'Pencil eyebrows'
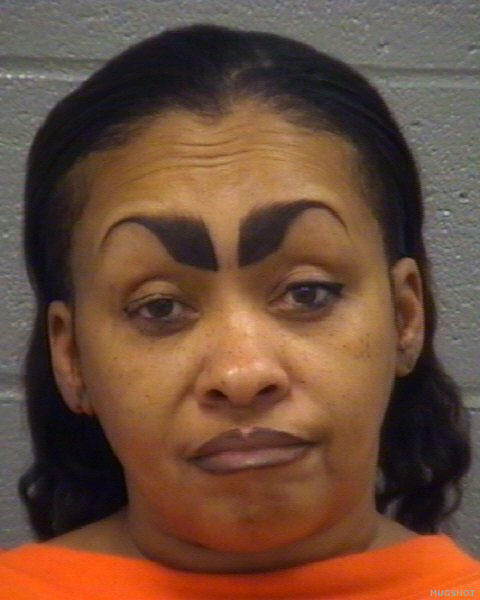
Has anyone seen when eyebrows are drawn really close together in the centre of the nose? whats up with that? Heres a tip, eyebrows are sisters, not twins. Stop making eyebrows look perfectly straight edged!
Say no more

Thanks for viewing my new blog. I'll be blogging other things such as reviews on various subjects/items and other stuff.

Thanks for reading, zoeelizabethdowden x 

Wednesday 21 January 2015

10 Eye Makeup Disasters

So I am in no way, in any shape or form a trained makeup artist, I have however taught myself like the majority of girls and boys and gained a passion for it. Somethings niggling me though. I'm starting to find some makeup looks slllliiiightly annoying.
These, in my opinion, are eye makeup disasters.
LETS HAVE A LOOK

1. 'Panda Eyes'

Before
After
I think everyone who starts using makeup ALWAYS starts with this look. I am ashamed to admit it but I started doing this and thought I looked amazing when in actual fact, I looked like a walking corpse. I am really pale and slathering black eyeshadow and black kohl pencil all around my eyes didn't help. What I did was literally draw a black circle around my eye and filled in the gaps with eyeshadow. Growing up, I have found many complementary looks for different skin tones and eyes but I've also found that with the right blending techniques, the 'panda eye' look can look amazing. Taylor Momsen is a prime example for this look. 
2. 'Instagram Eyebrows'


So has anyone else seen the 'Instagram Eyebrow'? Its when you draw the outline of your eyebrow around your actual eyebrow, fill it in like you would with a colouring book BUT you must not forget the gradient beginning. I mean, whos eyebrows start with a ombre effect? Everyone has hair there for a reason, ITS MENT TO BE THERE! I over tweeze my eyebrows so I fill them in with a brown eyeshadow and use a spoolie to brush the colour through, that way, your eyebrows look fuller without them looking drawn on. Anastasia Beverley Hills does fantastic eyebrow products or if you are looking for a drugstore alternative, Soap and Glory Archery in Brownie points is a light enough brown to suit any colour eyebrow and its a felt tip which means you can draw in little hairs to make your eyebrow look alot more natural.

3. 'Highlighted Eyelids'


I don't see anyone talking about this. It must just annoy me. I assume most people know where highlighter goes if you have some knowledge of makeup. I put highlighter on the highest dimensions on my face where natural light would usually hit it. I have incredibly dry skin so anything to make my face look glowing and dewy helps. This just looks..... strange.
4. 'Clumpy Eyelashes'


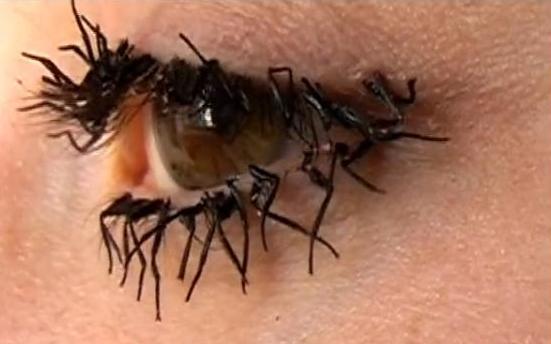
Don't get me wrong, when it comes to putting mascara on I can sit there for at least half hour and put coat after coat on until my eyelashes are as long as a Kylie Jenners. When your eyelashes start to look like mini spider legs though, thats when you need to question yourself, 'Is it halloween yet?'

5. 'White Undereye Concealer


I am all for light concealer underneath your eyes to make them pop and to make you look more awake but when it looks like your face have tanned quicker than your eyes, you need to ask yourself, 'Is the reverse raccoon look worth it?'  

6. 'Wonkey Eyeliner'

This accentuates your lash line and would take about 10-15 minutes to do 
This makes your eye look droopy and would take you 1-2 minutes to do 
If you ask a pefectionist who wears eyeliner why it takes so long here's the reason why:

7. 'Sperm Eyebrows'


I over tweeze my eyebrows and they somewhat resemble 'sperm eyebrows' without any product on them. I learnt using products such as Anastasia Beverley Hills dip brow with a fine angled brush to draw little hairs onto your eyebrows can really make your eyebrows look natural again. However, when products are used to follow the shape of the 'sperm eyebrow' you can look constantly surprised.

8. 'Eyeshadow Fall out'

So we all know eyeshadow fall out is one of the most annoying things to happen when applying eyeshadow and pigments. There are shields available to prevent this from happening but if you're like me and are always in a rush you will inevitably get fallout, forget about it and slowly look as if you got two black eyes.

9. 'Cellotape Lines'

Personally, I prefer eyeshadow blended out to nothing. It looks so much more natural and I understand why cellotape is used to give yourself a sharper look but does anyone else find it to uniformed? 


10. 'OTT False Eyelashes'


I LOOOOOOVE false eyelashes (anything to make my eyes look like Kylie Jenners) but when your false eyelashes touch your eyebrows, its time to take them off, no-one likes the drag queen effect, unless you're a drag queen, then ROCK IT!

This is my very first blog so I hope you enjoyed reading it.
Thanks for reading, zoeelizabethdowden x